VRoid tracking improvement tips for beginners!
If you look at my streams and go “Monday your tracking’s good, I want better tracking but I can’t afford an iPhone,” first thank you, that’s so nice of you to think! I use VSeeFace + a kinda potato webcam with really bad lighting and I’m proud of what I’ve managed to pull off! (I’m not kidding on the lighting, sometimes I stream practically in the dark I am 100% serious.) And second, you likely can get the exact same results if not better with your own model pretty fast! So let’s talk how to make it happen! I’m going to cover this in two parts: during model editing if you’re making your own model, and tips for when you’re prepping for streams!
(And yes, I know my tracking could be better and I am painfully aware of how to improve it, but that’s also kind of my point, you can get a lot done with some small tweaks and without moving to higher end tracking!)
And a note: this is for beginners, I won't be going into blendshape editing or toggles or anything like that. If you're looking for that stuff, I'd check out Kana Fuyuko's videos!
When you’re editing your model:
The VRoid Studio Expression Editor can fix a lot of minor issues! VRoid Studio has a built in editor for your basic blendshapes, and it can help a ton with minor issues like blinks going into your face or the mouth being too wide when you’re excited. (Also for some VRoid eye shapes you can make the blink a lot cuter in the Expression Editor!)
Don’t know how to find it? When you're in VRoid Studio, click on the Face tab and then you'll find the Expression Editor as a little face icon at the very bottom of the left column's options!

Once you're in the Editor, you can use the tabs on the right column to add in base expression edits for Neutral, Smiling, Sad, Angry, Happy, and Surprised, along with closed eye expressions and A/I/U/E/O mouth forms. While I do still think adding the full ARKit blendshape suite is worth it, especially if you have access to an iPhone/better tracking tools, this can fix a lot of beginner clipping issues really fast!
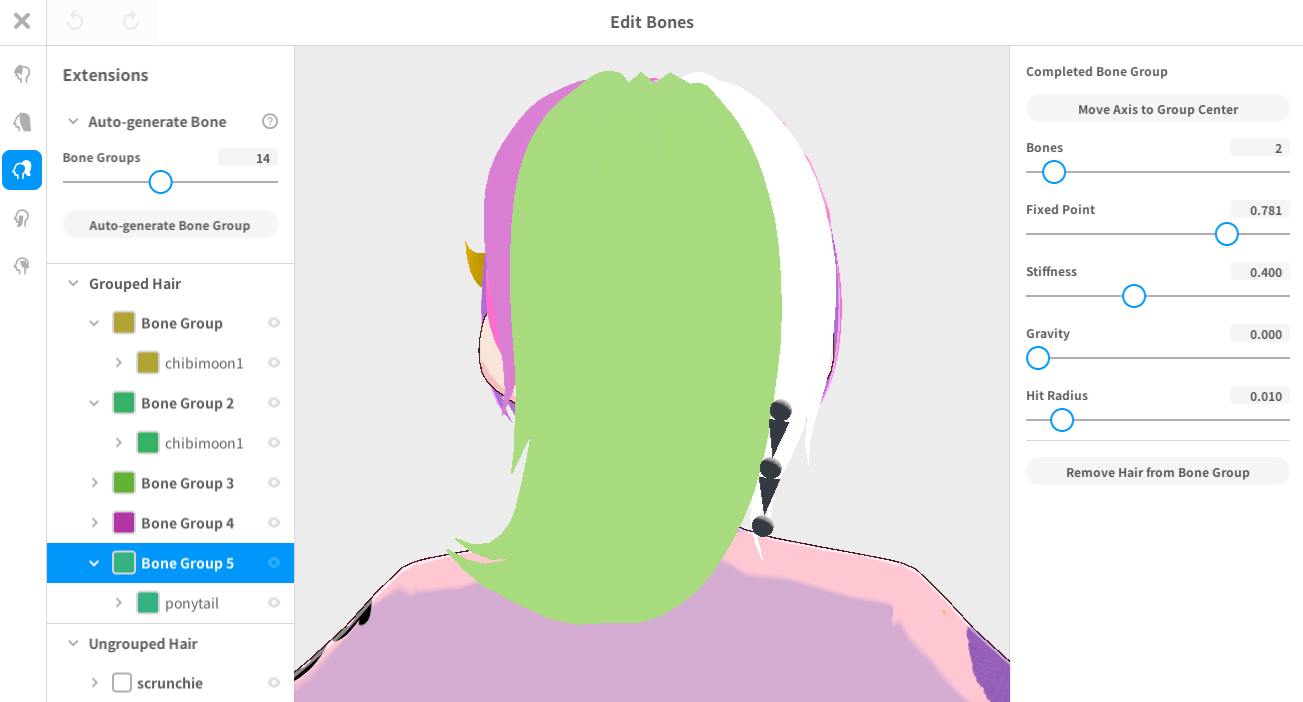
Update your hair bones! If you're brand new to VRoid terms, VRoid hair is rigged using bones and bone groups, and where and how the bones are set up matters a ton for how your hair will move!
If you're using VRoid hair presets (so you just picked the styling and colored stuff in yourself, maybe you moved a piece of hair but didn't add any), the bones will be pre-rigged. Any hair you add on will be without bones, and will need to be rigged once you're done. To edit the bones, you need to go back to the Hairstyle point where you can pick the section of hair you'll be working on, and instead of clicking on 'Edit Hairstyle' you'll click on 'Edit Hair Bounce.'

From here you'll see hair in colored groups if your hair is in a preset or already grouped, or not if you lack bones, and you can group them from here and set them up!
And I know this must all seem intimidating, especially since I'm giving a very fast summary, but editing the bones is a lot less scary than it looks! And you can always save versions of the bones and go back if you don’t like what you’ve done!
That being said, I think it's worth the time to listen to a tutorial before really diving in just to understand what each of the tools can do. Kariha has one of the more comprehensive introductions to hair bones and hair bone settings, so I’d watch this video and then try some hair movement styles and see how they feel for you!
And to show some examples, here's part of my older model's hair bones, which were a VRoid preset. We've got a high number of bones, and also the fixed point is super high up, which together with the gravity/movement edits makes for a floaty effect. That might work well for you if you're a ghost or elf type vtuber!

For my current model's hair I wanted a more 'snappy' movement, so the bones are fewer, lower, and less floaty in the movement settings!

Optional: Evaluate your eye textures. A lot of the VRoid Studio presets - and even many custom options - don’t have eyes with clear definition, and while soft fluffy eye textures can look lovely on the model, they can make it weirdly hard to tell which way your model’s looking when you’re streaming. Glasses can help there in a pinch if you like glasses for your design, but they can’t fix everything. You don’t have to redo the whole eye texture either! Adding well defined highlights or pupils can really be all it takes! I’d test a few options and see what feels right for you!
When you’re streaming:
Install Spout2 in OBS and run your model as a Spout2 capture instead of a game capture. I was hesitant to do this myself at first - you mean I have to install more stuff when I’m already scared of all the stuff I have to learn!? - but it really does help speed up your model so you’ll lag less! And once it’s installed you can pretty much set it and forget it!
Here’s the video I used to do my installation, while it’s for Live2D the OBS setup is the same!
Make your face as easy to track as possible. You want as little blocking your face as possible during tracking, as tough as that can be. In my case I have long hair and bangs, so for streaming I push my bangs back and clip the rest of my hair up. (I do wear glasses like my model but I don’t wear glasses to stream.)
Some folks will recommend eyeliner/mascara and red lipstick to aid in making tracking easier, others will suggest lighting, I’d test both with a caveat: if you can, I’d try to improve the room’s overall lighting rather than going for a ring light/something shining at your face for 4+ hours you deserve functional eyeballs and I know how long you all stream, it’s not good for your eyes to have a light shining at them that long hoo boy.
This is why I use cheap Ikea floor lamps set behind me, they add a lot of light to the room without light being in my eyes. (Not remotely sponsored, here’s the lamp I’ve got, you could probably find them for free if there’s a college near you during move out week)
If you’re running VSeeFace, make VSeeFace a full sized window. This is just for VSeeFace yes, but this really can make VSeeFace models look just that much more crisp in OBS.
Crop your model more closely in OBS. I know your model’s beautiful and you/your vtuber parents worked so hard on it and you want to show it off! But unless you have VNyan or Warudo on with a breathing pendulum activated or are using hand tracking, the lack of movement in the arms can and will stand out. Also if you crop in your model from the waist/bust up instead of hips up, we’ll be able to see your face better!
Here's a comparison using a super old model of mine, with the shirt made by KaitoSai!

I know it's not moving so it's not the greatest comparison, but with more of the model shown we have more of my *non-moving arms and body* shown, and they stand out more! Cropping higher up means more visual focus on my face, and I could zoom in that version a lot more!
Puppet your model! Honestly this is the single biggest tip I can give you, and the other steps above will make the puppeteering shine! Because you’re likely thinking “but I puppet my model!” but after doing a lot of research I’ve found that most folks are moving their models around a lot less than they think they are, especially once the game starts if they’re gaming streamers. There’s just a lot of expression and nuance lost when you’re talking into a model instead of showing your face, and you’ve got to breathe life into your model when you stream. This is not going to be easy, but it’s so so worth it!
This video of Shylily talking about her Live2D model is what got my brain to click on this, and really the way you fix it, as tough as it’s going to be, is you watch your VODs. Are you as expressive as you want to be, are there blinks or turns or movements you could add in for more personality? With practice you’ll get the vibes you’re after!